THIS IS THE FINAL OUTCOME
The process of making the final outcome.
Step 1: Open Adobe Flash file. Then choose the ActionScript 3.0.
Step 2: For the exercise requirement is dimension size of 400pixels X 250pixels and 12 fps.
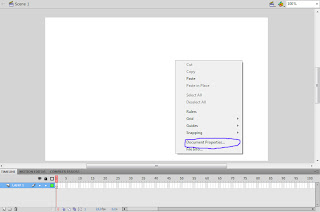
So, right click and choose Document Properties change the value.
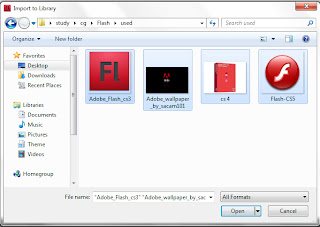
Step 3: Click File > Import > Import to library and choose the pictures that wanted. Those pictures will imported to the library window.
About Time Line.
We have to know some Shortcut key for us to continue the works.
Here are the Important Shortcut Key:
F5 = Insert Frames.Insert the amount of frames you want.
F6 = Convert to Key Frame.Seperate or start another frames.
V = Selection Tools.Select items.
Q = Free Transform Tools. Free Transformation.
Ctrl + T = Transform. For details Transformation.
Step 4: Create and name the layer as Background. Sets the fps (Frame per second) into 12.0fps.
Choose background picture from library, after that click and drag the picture and put into the stage.
Step 5: For requirement is to produce a 4 sec product. So,12 fames per second and have to make total 48 frames for background picture. Click at the frame 48, and then press F5.
Step 6: Create and name the new layer Picture 2. Then resize and place it nicely. Drag the keyframe to 12 so that the Picture 2 will appear at that time.
Step 7: Create and name the new layer Picture 3. Then resize and place it nicely. Drag the keyframe to 24 so that the Picture 3 will appear at that time.
Step 8: Create and name the new layer Picture 4. Then resize and place it nicely. Drag the keyframe to 36 so that the Picture 4 will appear at that time.
Step 9: Create and name the new layer Text. Then resize and place it nicely. Drag the keyframe to 36 so that the Text will appear at that time.


No comments:
Post a Comment