
This is my work that i had done.

Step 1: Open a picture.

Step 2: Crop the image by using the crop tool (C).

Step 3: Click Images > Adjustments > Auto Color or press Shift + Ctrl + B

Step 3: Click Images > Adjustments > Shadow / Highlight

Step 4: Adjust the value of shadow and highlight.

Step 5: Click Images > Adjustments > Color Balance or press Ctrl + B. Adjust the value of cyan, magenta and yellow.

Step 6: Click Select > Color Range
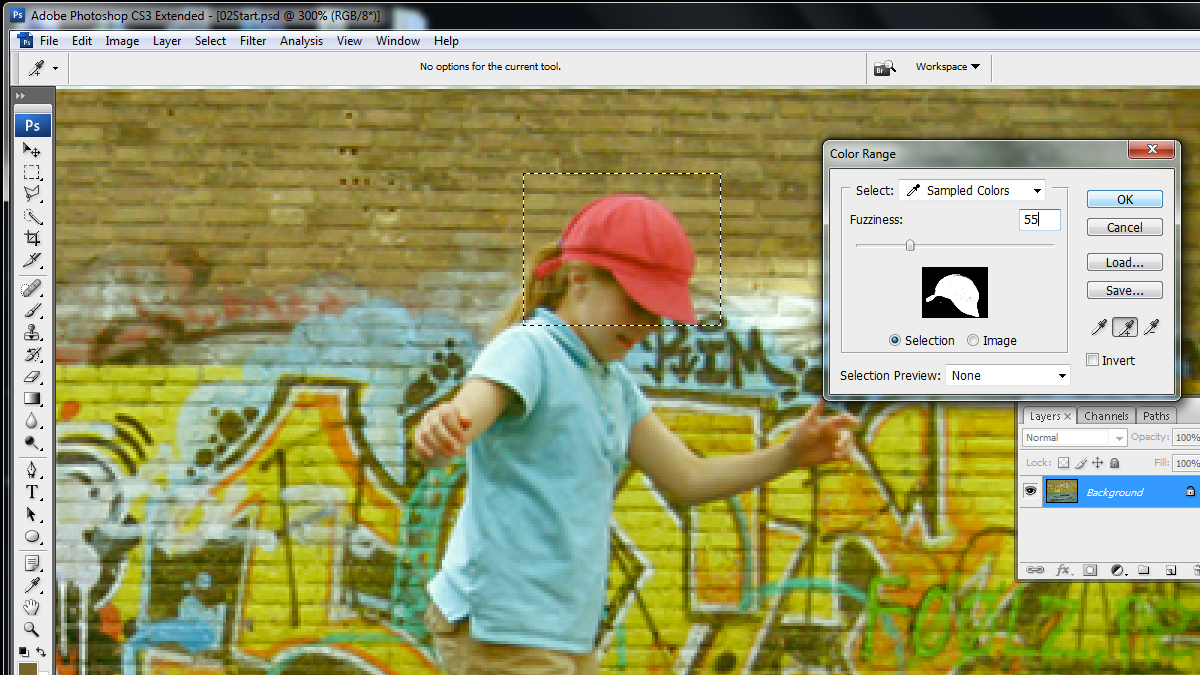
Step 7: Pointed the eyedropper on the cape until it is white in the column of color range. Then change the value of fuzziness to 55 and click OK.

Step 8: Click Images > Adjustments > Hue / Saturation or press Ctrl + B. Adjust the value of hue and saturation until it is balance.


Step 9: Click Window > Histogram > Expand View and adjust the value of the shadow.

Step 10: Choose the Dodge tool (O) and highlight the round hoop. It will become lighter and bright.

Step 11: Choose the clone stamp tool (S) and click alt + click on the bridge and stamp it on the white surface.


Step 12: Use the spot healing brush tool (J) to make the crack away.


Step 13: Use the patch tool and surrounded the area that dirty. It likely same as lasso tool. Then drag the surrounded to the clean surface and is done.

Step 14: Click Images > Mode > CMYK Color to change it from RGB color to CMYK color.
Finally it is done and this is the result
 before
 after
after
No comments:
Post a Comment